Leave a Reply
LATEST BUSINESS POSTS
If you’re a photographer looking for a website that is both beautiful and functional, chances are you’ve heard about Showit. But with so many website platforms and templates available, it’s normal to have questions before investing. In this guide, I’ll answer the most common questions photographers ask about Showit website templates so you can decide if they’re the right fit for your business.
And if you’re ready to skip the research and dive straight in, you can browse my Showit website templates here.
1. What is a Showit template, and how does it work?
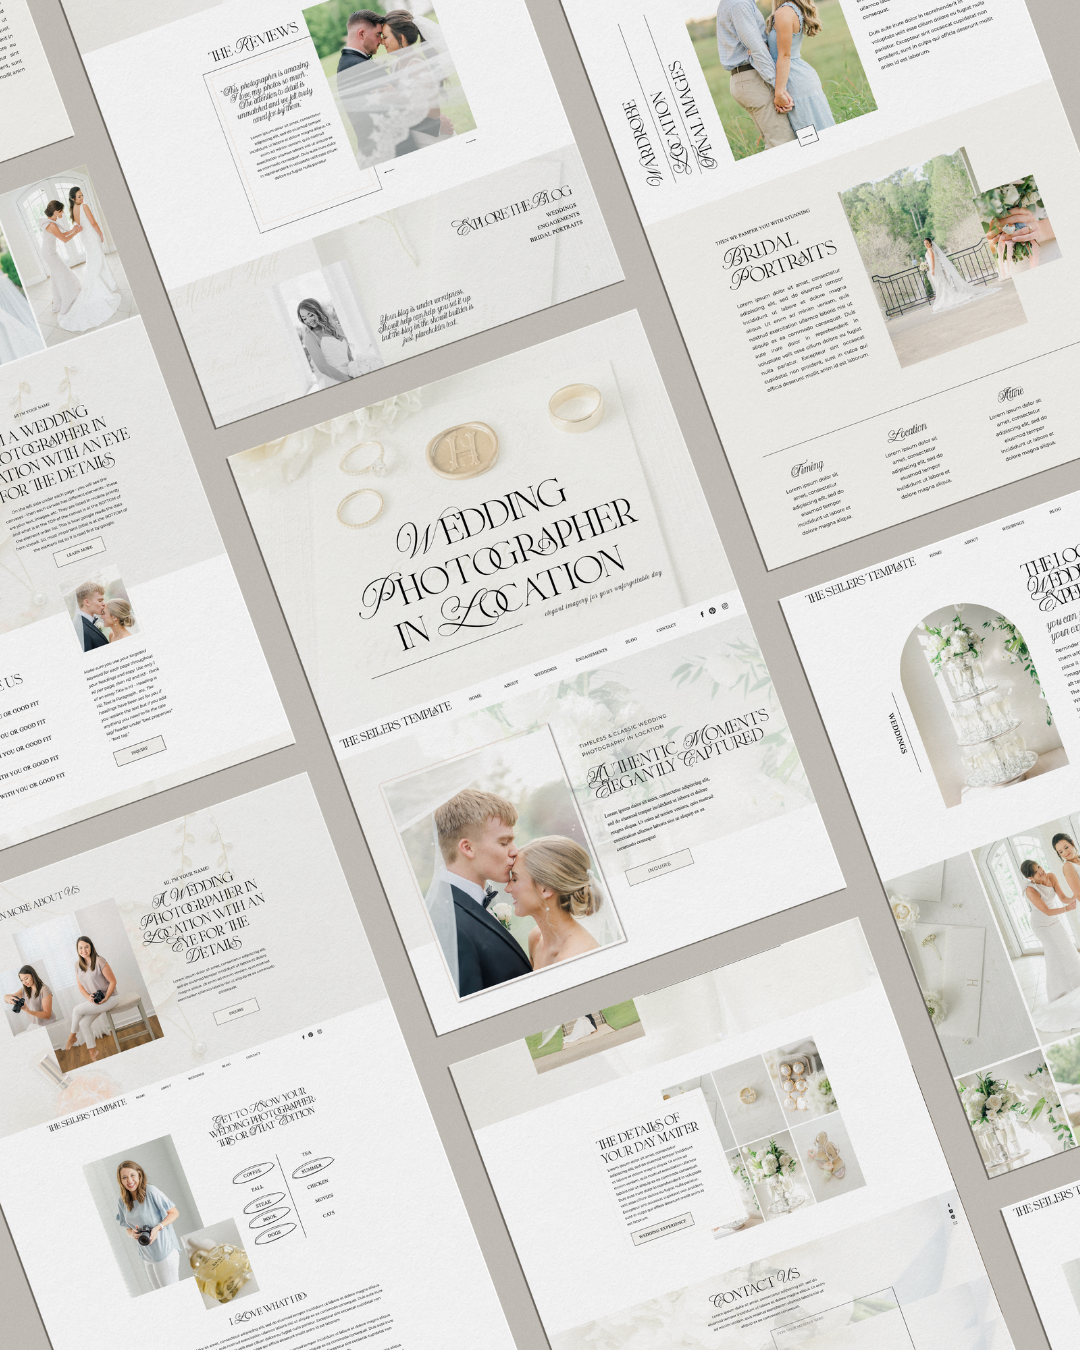
A Showit template is a pre-designed website layout built for the Showit platform. Instead of starting from scratch, you can install a template and customize it with your own branding, photos, copy, and colors. It’s drag-and-drop, meaning you don’t need to know code to create a stunning, functional site that reflects your photography brand.
Want to see what that looks like in action? Check out my template demos here.
2. Can Showit templates be customized (fonts, colors, images, layout)?
Yes! Showit templates are fully customizable. You can swap out fonts, colors, layouts, images, and copy to make the design unique to your business. Some templates use premium fonts that may require purchasing a license, but otherwise, you have complete creative freedom to make the site your own.
I always let you know if my templates require an additional font license.
3. Do Showit templates work well on mobile?
Absolutely. Showit allows you to design for desktop and mobile separately, which means you can customize both experiences. All high-quality Showit templates are built with mobile optimization in mind, so your clients have a seamless experience on mobile or desktop.
4. Are Showit templates SEO friendly?
Yes, when they’re designed properly. My templates are built with SEO structure in mind, including proper heading hierarchy and clean element organization. Plus, my templates include a 35+ page DIY guide that walks you through how to write SEO-friendly copy, add keywords, and structure your website content to get found on Google.
5. Do I need to know how to code to use a Showit template?
Not at all! Showit is a code-free platform with a drag-and-drop interface. If you can move elements around, type text, and upload photos, you can customize your site. It’s one of the most beginner-friendly platforms available, especially for creatives who want design flexibility without coding headaches.
6. What does a Showit subscription cost, and do I need one alongside buying a template?
Yes, you’ll need a Showit subscription to host and run your site. Plans typically range depending on whether you need a blog (powered by WordPress) or just a website. The subscription covers your hosting and support, while the template is a one-time purchase that gives you your site’s design.
7. Does Showit include hosting and domain setup?
Yes! Showit includes hosting for your website and blog. You’ll connect your custom domain through the platform, and Showit’s support team will guide you through the setup. Since blogging integrates with WordPress, everything is hosted seamlessly in one place.
8. How do I link or migrate a blog with WordPress when using Showit?
If you already have a WordPress blog, Showit makes it easy to migrate your content. Their support team handles the heavy lifting to ensure your posts transfer correctly. New users can set up a WordPress blog through Showit directly, which is included in certain subscription tiers.
9. Will my Showit template look like everyone else’s? How can I make it unique?
While the starting design is the same, no two finished websites look alike when templates are customized. By adding your fonts, colors, imagery, and copy, you’ll create a site that reflects your unique brand. Think of the template as a starting point that saves you time and money without locking you into a “cookie-cutter” look.
10. What support or tutorials are included with the template?
All my templates include a detailed 35+ page DIY guide to help you launch step by step. Showit also provides robust support, including live chat, tutorials, and a helpful community. You won’t be left guessing and you’ll have guidance every step of the way.
11. Are there extra costs (fonts licensing, plugin fees, etc.) after purchasing the template?
In most cases, no. The main additional cost may be premium font licenses if your template uses them. You’ll also need an active Showit subscription. Optional extras like plugins, accents, or add-on features are completely up to you but not required to launch your website.
12. What’s the difference between a custom Showit website and using a Showit template?
A custom Showit site is designed from the ground up and usually comes with a higher price tag and longer turnaround time. A template gives you a ready-made design at a fraction of the cost, which you can customize to look professional and unique. Templates are ideal for photographers who want a polished site quickly and affordably.
13. How long will it take me to launch a website using a Showit template?
Most photographers can launch within a few days to a couple of weeks, depending on how much content they have ready. Since the design is already done, the main work is adding your own copy, photos, and branding. My DIY guide speeds up the process so you can launch quickly and confidently.
14. If I’m not tech-savvy, will I be able to use a Showit template effectively?
Yes! Showit was designed for creatives, not coders. The drag-and-drop system is beginner-friendly, and my templates include easy-to-follow instructions. Plus, if you’d rather not DIY at all, I offer done-for-you customization services where I handle the setup for you.
Don’t want to DIY? Learn more about my done-for-you website setup here.
15. Can I upgrade or change my Showit template later if my business grows?
Definitely. One of the best parts of Showit is flexibility. You can switch to a new template, add additional pages, or refresh your design as your photography business evolves. You’ll never be “stuck” with one look forever.
You can’t go wrong with a Showit Website Template designed for Photographers
Showit website templates are a powerful solution for photographers who want a professional, SEO-friendly website without the stress of coding or the cost of full custom design. Whether you want to DIY your site or have help along the way, these templates give you the flexibility and strategy you need to grow your photography business online.
Ready to launch your dream website? Browse my Showit templates for photographers here.


LEAVE A COMMENT
0
comments